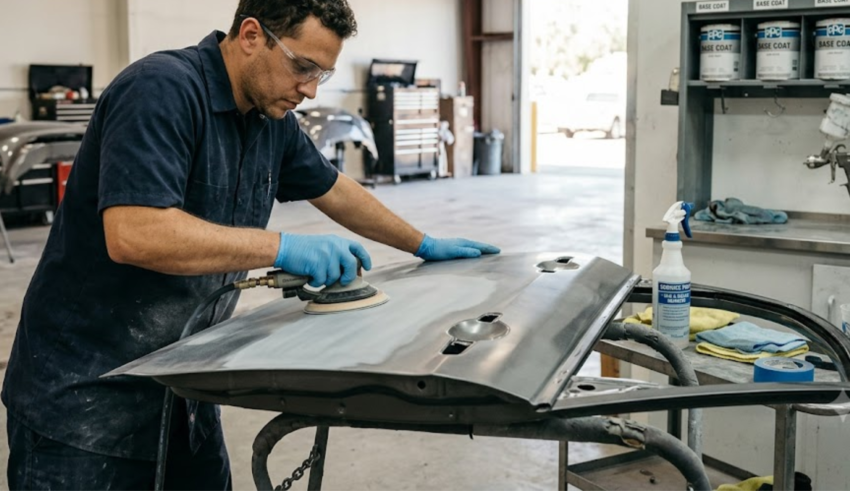
There is a familiar rush of excitement in auto body restoration that happens right when the masking tape goes on and the spray gun comes out. Laying down a fresh coat of color is the most visually gratifying step in any refinishing project. Whether you are restoring a vintage classic to its showroom glory or repairing a late-model bumper, watching dull, gray primer transform under a rich, metallic hue feels like the finish line is finally in sight.
However, experienced auto painters know that the magic of a flawless finish happens long before the spray booth is ever turned on. In fact, professional refinishing is widely considered to be 90% preparation and only 10% painting. Try to rush through the foundational stages of block sanding, cleaning, and scuffing, and your final paint job will inevitably fail no matter how top-tier your spray equipment or materials might be. Proper prep ensures paint adhesion and longevity when applying high-performance Automotive Base Coat Paint.
Understanding the scientific and physical relationship between your base coat and the prep work underneath is essential for achieving a durable, mirror-like finish that won’t peel, bubble, or fade over time.
1. The Anatomy of Modern Base Coat Systems
To understand why surface preparation is so critical, you have to understand how modern two-stage (base coat/clear coat) automotive paint actually works. Unlike old-school single-stage enamels or lacquers which were laid down thick and contained their own gloss and UV protectants, a modern base coat is engineered to do only one job: deliver pure, vibrant color and metallic effect.
Because it lacks heavy building resins, an automotive base coat is sprayed incredibly thin, typically measuring just 1 to 1.5 mils (thousandths of an inch) dry film thickness. It relies entirely on the underlying primer for its structural grip and on the clear coat applied above it for gloss, physical protection, and UV resistance. Because this color layer is so thin and fragile during application, the substrate beneath it must be engineered to structural and chemical perfection.
2. The Science of Adhesion and “Mechanical Tooth”
Paint does not stick to a vehicle’s body panels by chemical bonding alone; it requires a physical grip known in the industry as a mechanical tooth. When you sand a surface with abrasives, you are essentially carving millions of microscopic valleys and ridges into the old paint, bare metal, or primer surfacer.
When you atomize and spray liquid base coat onto this prepared panel, the paint polymers flow into these microscopic grooves, interlocking with the surface as the solvents evaporate.
- What happens if the surface is too smooth? If you attempt to spray base coat over a panel that has not been properly scuffed or was sanded with an excessively fine abrasive, the liquid paint has nothing to anchor onto. Once the vehicle is exposed to thermal expansion from engine heat, freezing winter temperatures, or the high-pressure spray of a car wash, the base coat will delaminate and peel away in large sheets.
- What happens if the scratches are too deep? Conversely, if you prep your primer with an abrasive that is too aggressive (such as 180-grit or 320-grit), those deep scratch profiles will remain visible. Because base coat has virtually zero filling capability, it will simply contour to the gouges, leaving a noticeable, scratchy texture beneath your glossy clear coat. A final wet-sand with P600-grit sandpaper is widely considered the industry standard for creating the perfect mechanical tooth for standard solid and metallic base coats.
3. The Invisible Enemy: Chemical Contaminants and “Fish-Eyes”
Even a panel that has been sanded to mechanical perfection can reject fresh paint if invisible chemical contaminants are present. Vehicles operating on public roads are constantly bombarded with hydrophobic (water-repelling) substances, including road tar, diesel exhaust residue, tree sap, and synthetic silicone tire shines. Furthermore, human skin oils transferred simply by touching a prepped panel can leave behind microscopic grease trails.
If you spray an automotive base coat over these trapped oils or silicones, the surface tension of the liquid paint is disrupted. Instead of flowing into a smooth, uniform film, the paint actively pulls away from the contaminant, creating circular craters across the panel known as fish-eyes.
To prevent chemical rejection, aggressive decontamination must occur before and after sanding:
[ Chemical Decontamination Pipeline ]
      |
      +---> 1. High-Alkaline Wash (Strips loose dirt and surface waxes)
      |
      +---> 2. Solvent-Based Prep-Sol (Dissolves heavy tar, silicone, and grease)
      |
      +---> 3. Block Sanding & Defect Leveling (Creates mechanical tooth)
      |
      +---> 4. Water-Based Surface Cleaner (Removes fine sanding dust and static)
      |
      +---> 5. Tack Rag Pass (Captures airborne lint immediately before spraying)
When applying solvent-based wax and grease removers, always use the two-towel method: wipe the wet chemical onto the panel with one clean microfiber towel to dissolve the oils, and immediately buff the surface dry with a second clean towel before the solvent flashes off and redeposits the contaminants back into the sanding scratches.
4. How Thin Base Coats Amplify Surface Defects
A common misconception among beginner painters is that a few heavy coats of color will hide minor bodywork imperfections, low spots, or pinholes in the body filler. In reality, modern automotive base coats do the exact opposite—they act like an optical magnifying glass.
Because metallic and pearl base coats contain microscopic aluminum flakes or mica pigments, they reflect light at highly specific angles. If your underlying primer surfacer has even the slightest wavy distortion from uneven hand-sanding, those metallic flakes will lay down at varying angles across the wave. When the vehicle is rolled out into direct sunlight, these unevenly oriented flakes will create dark, blotchy bands known as mottling or tiger striping.
To guarantee a dead-flat surface that allows metallic flakes to orient uniformly, block sanding your high-build primer with a rigid backing pad and a contrasting guide coat is mandatory. The guide coat instantly highlights pinholes and high/low spots, ensuring the panel is optically flat before color is applied.
5. The Surface Preparation Checklist
To achieve consistent, showroom-grade results, follow this structured surface preparation timeline before loading your spray gun:
| Stage | Primary Material / Tool | Objective |
| 1. Initial Strip | Automotive Wax & Grease Remover | Eliminate silicone, road wax, and grease before sanding embeds them into the substrate. |
| 2. Feathering | P180 to P320 Grit Sandpaper | Level out body filler transitions and feather existing paint chips flush with the bare metal. |
| 3. Priming | High-Build Urethane Primer | Seal porous fillers, provide corrosion protection, and build uniform film thickness for leveling. |
| 4. Final Block | P600 Grit Wet/Dry Paper + Guide Coat | Level the primer surfacer completely flat and establish the optimal mechanical tooth. |
| 5. Anti-Static | Water-Based Panel Wipe & Tack Rag | Remove electrostatic charge, residual sanding sludge, and airborne lint right before spraying. |
Conclusion
Cutting corners during the preparation phase is the fastest way to ruin an expensive automotive refinishing project. An automotive base coat is an advanced chemical formulation designed to deliver breathtaking color and visual depth, but it is entirely dependent on the structural integrity, cleanliness, and texture of the surface beneath it. By respecting the science of mechanical adhesion, executing a rigorous two-towel chemical decontamination, and block sanding your primer to optical perfection, you create an invincible foundation. When you take the time to prep the metal and primer correctly, your base coat will lay down smoothly, bond permanently, and provide a stunning canvas for a finish that commands attention on the road or on the show field.
Frequently Asked Questions (FAQ)
Q: Do I need to strip the original factory paint down to bare metal before applying a new base coat?
A: Not necessarily. If the existing factory OEM finish is in sound structural condition, meaning it is not peeling, severely cracked, rusting, or chalking, it can serve as an excellent substrate. You simply need to clean it thoroughly and scuff the clear coat completely dull with P600-grit sandpaper or a gray scuff pad so the new base coat can establish a strong mechanical bond.
Q: How long can I wait between sanding my primer and spraying my base coat?
A: Ideally, you should apply your base coat within 24 hours of your final sanding and cleaning phase. Once a panel is sanded, it immediately begins accumulating airborne dust, shop moisture, and static electricity. Furthermore, some primers and sealers have an “open window” for chemical adhesion that closes after a set timeframe (typically 12 to 24 hours), after which they must be lightly re-scuffed before painting.
Q: Why is my metallic base coat looking blotchy and uneven after it dries?
A: Blotchy or streaky metallic paint (often called mottling) is typically caused by three prep- and application-related errors: spraying over an uneven, wavy substrate; applying the base coat with too low of an air pressure (which fails to atomize the metallic flake properly); or spraying the coats too wet and heavy, which allows the aluminum flakes to float and clump together before the solvents evaporate.